First I pick my fabric. Today I used this swirly glitter pattern. You don't need a lot so I just bought half a yard.


Next you will need batting. People usually use this in quilts, but I will be using it in my saddle pad! I got the thinnest one to be in scale. Don't worry if it looks thick because it gets compressed as you sew.

I cut out a rectangle bigger than my saddle pad. This way I can cut the shape out later.

Once I have the rectangle I cut the batting to go in between the two layers of fabric.

To make the batting be in the middle I place it like a sandwich. I fold the fabric in half and line it up with the fold line.

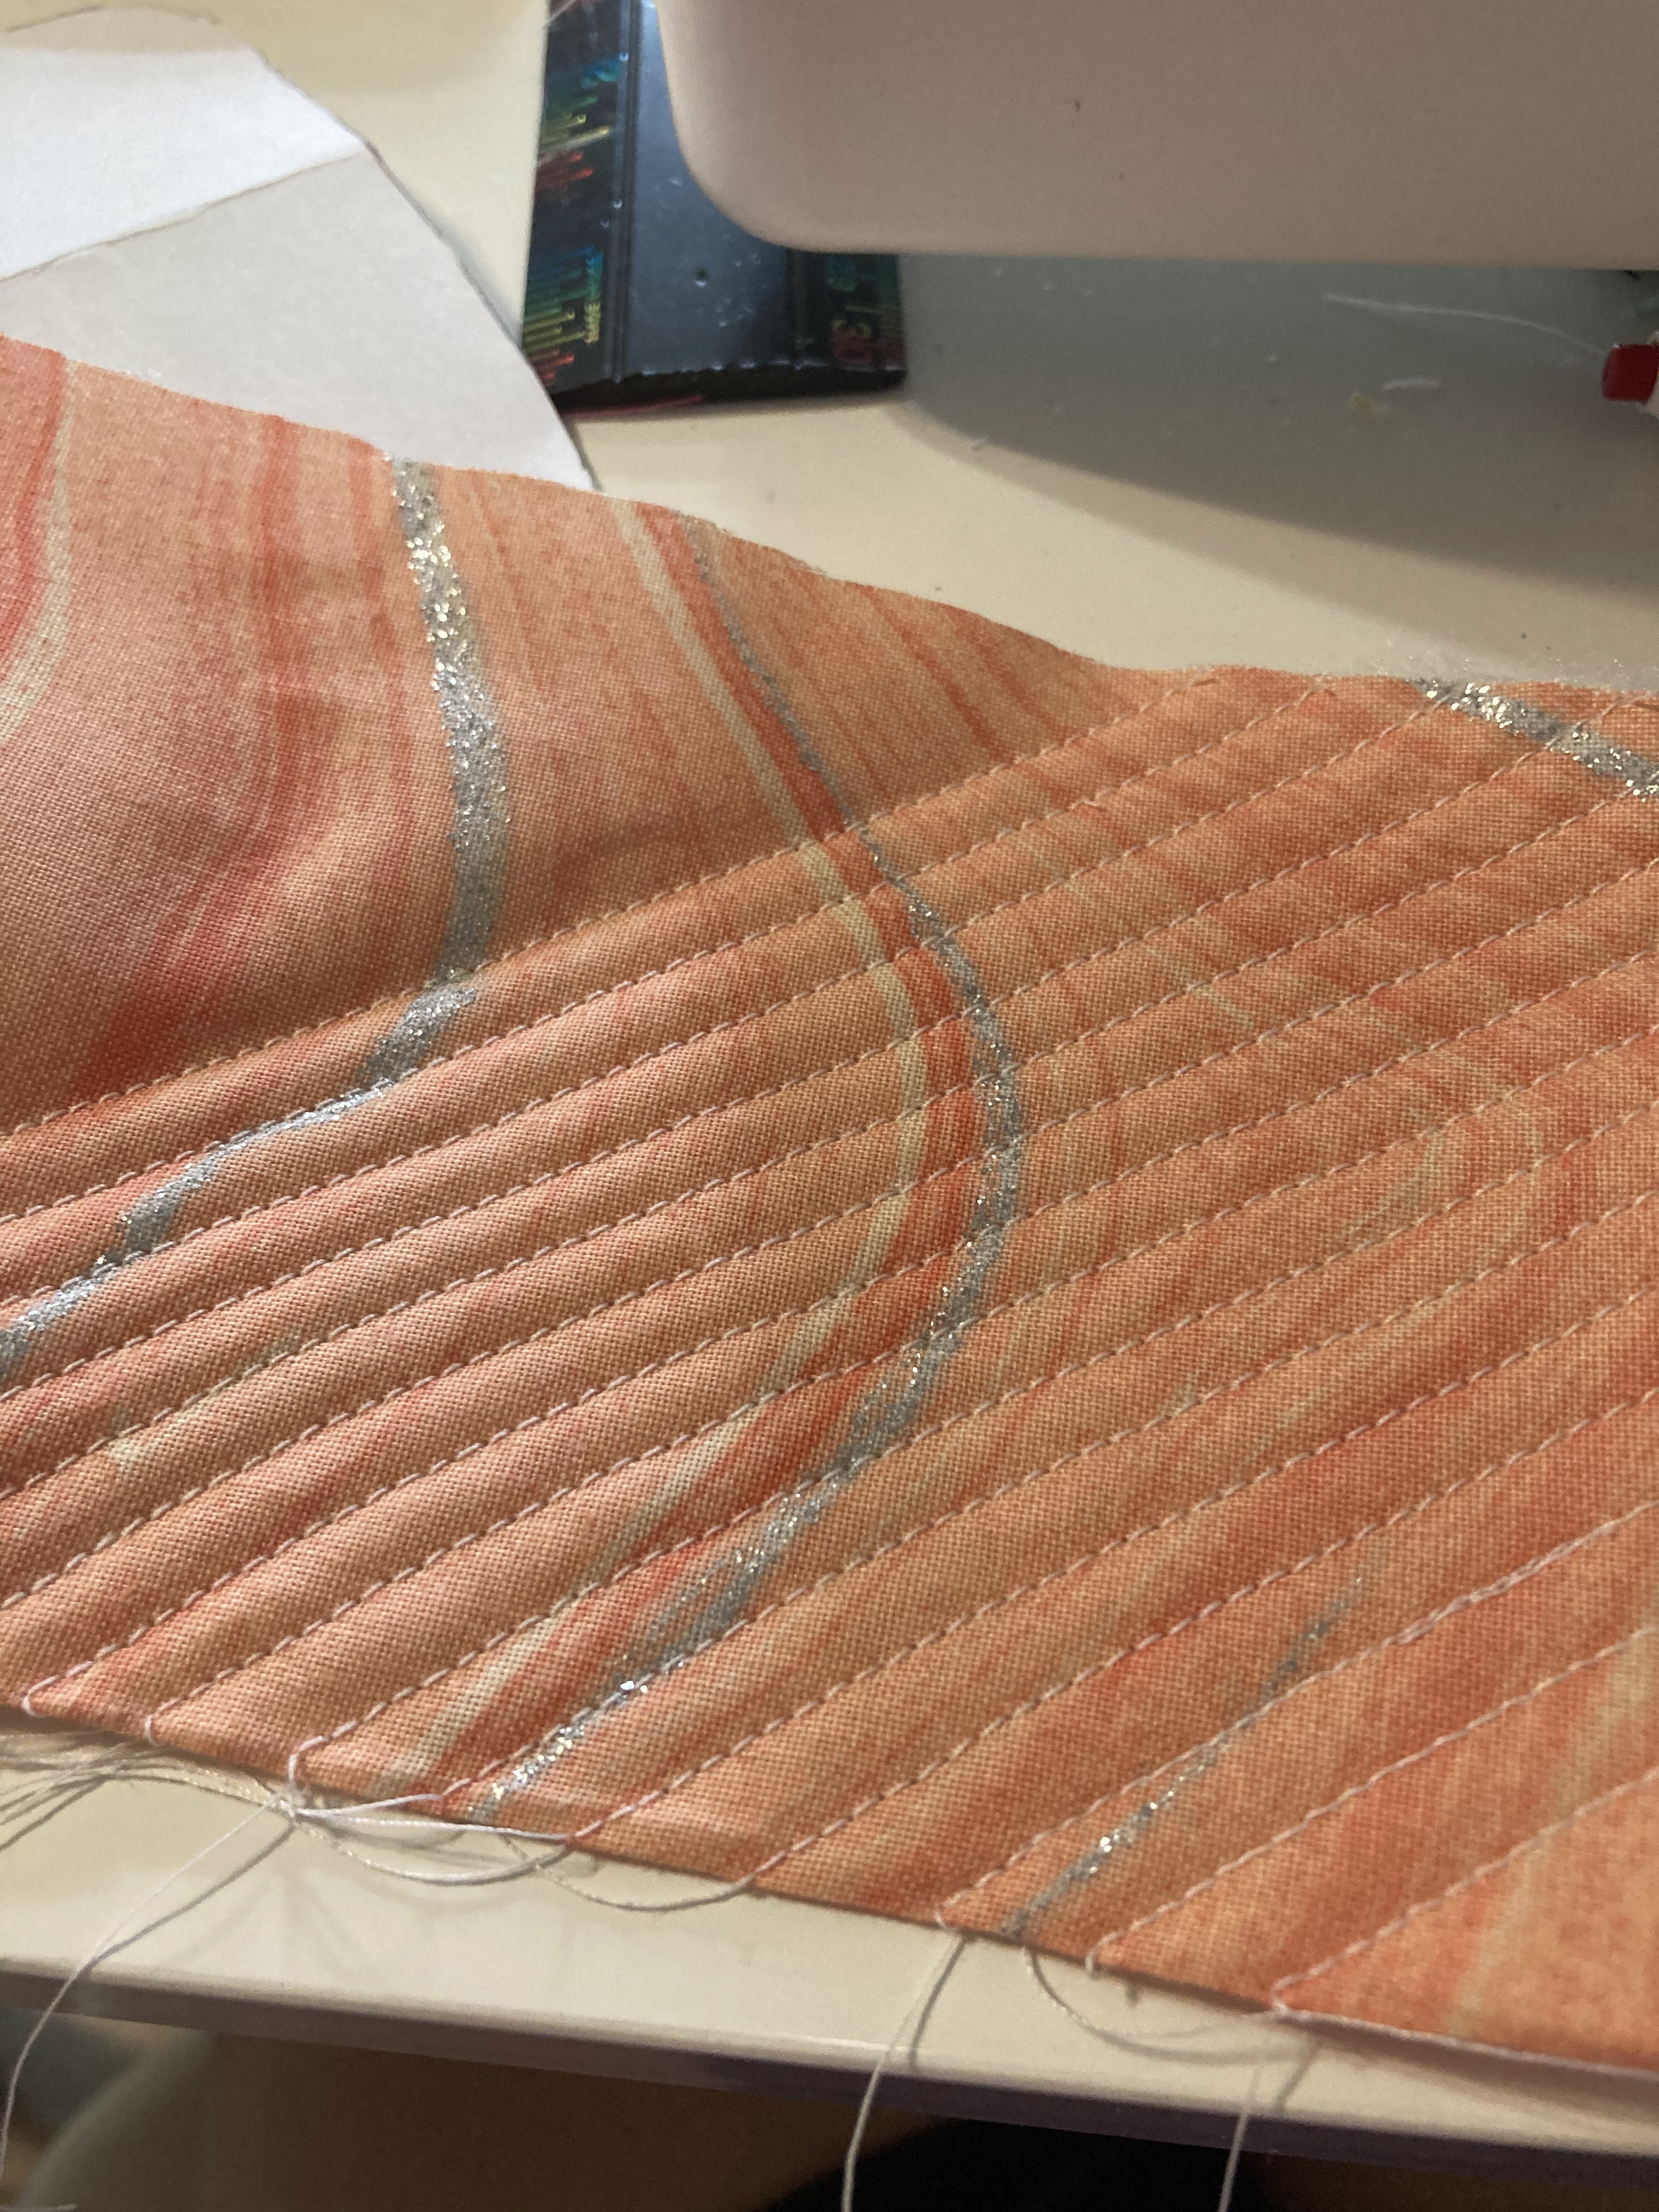
Now I'm ready to sew! To start I position the needle at the corner, and then I just let it go! I don't hold it I just let the machine do the work. I know you might be wondering why I'm not holding it, well it's because this way I get a perfectly straight line.

After you have that sew line I line it up with my foot. Which in this case is the second grove. This is how I get fairly even lines.

This is defiantly the most time consuming part, if you don;t take your time the lines might come out funky and you may have to sew them again. ( I have done this many, many times. That is the reason I have so many fails!)

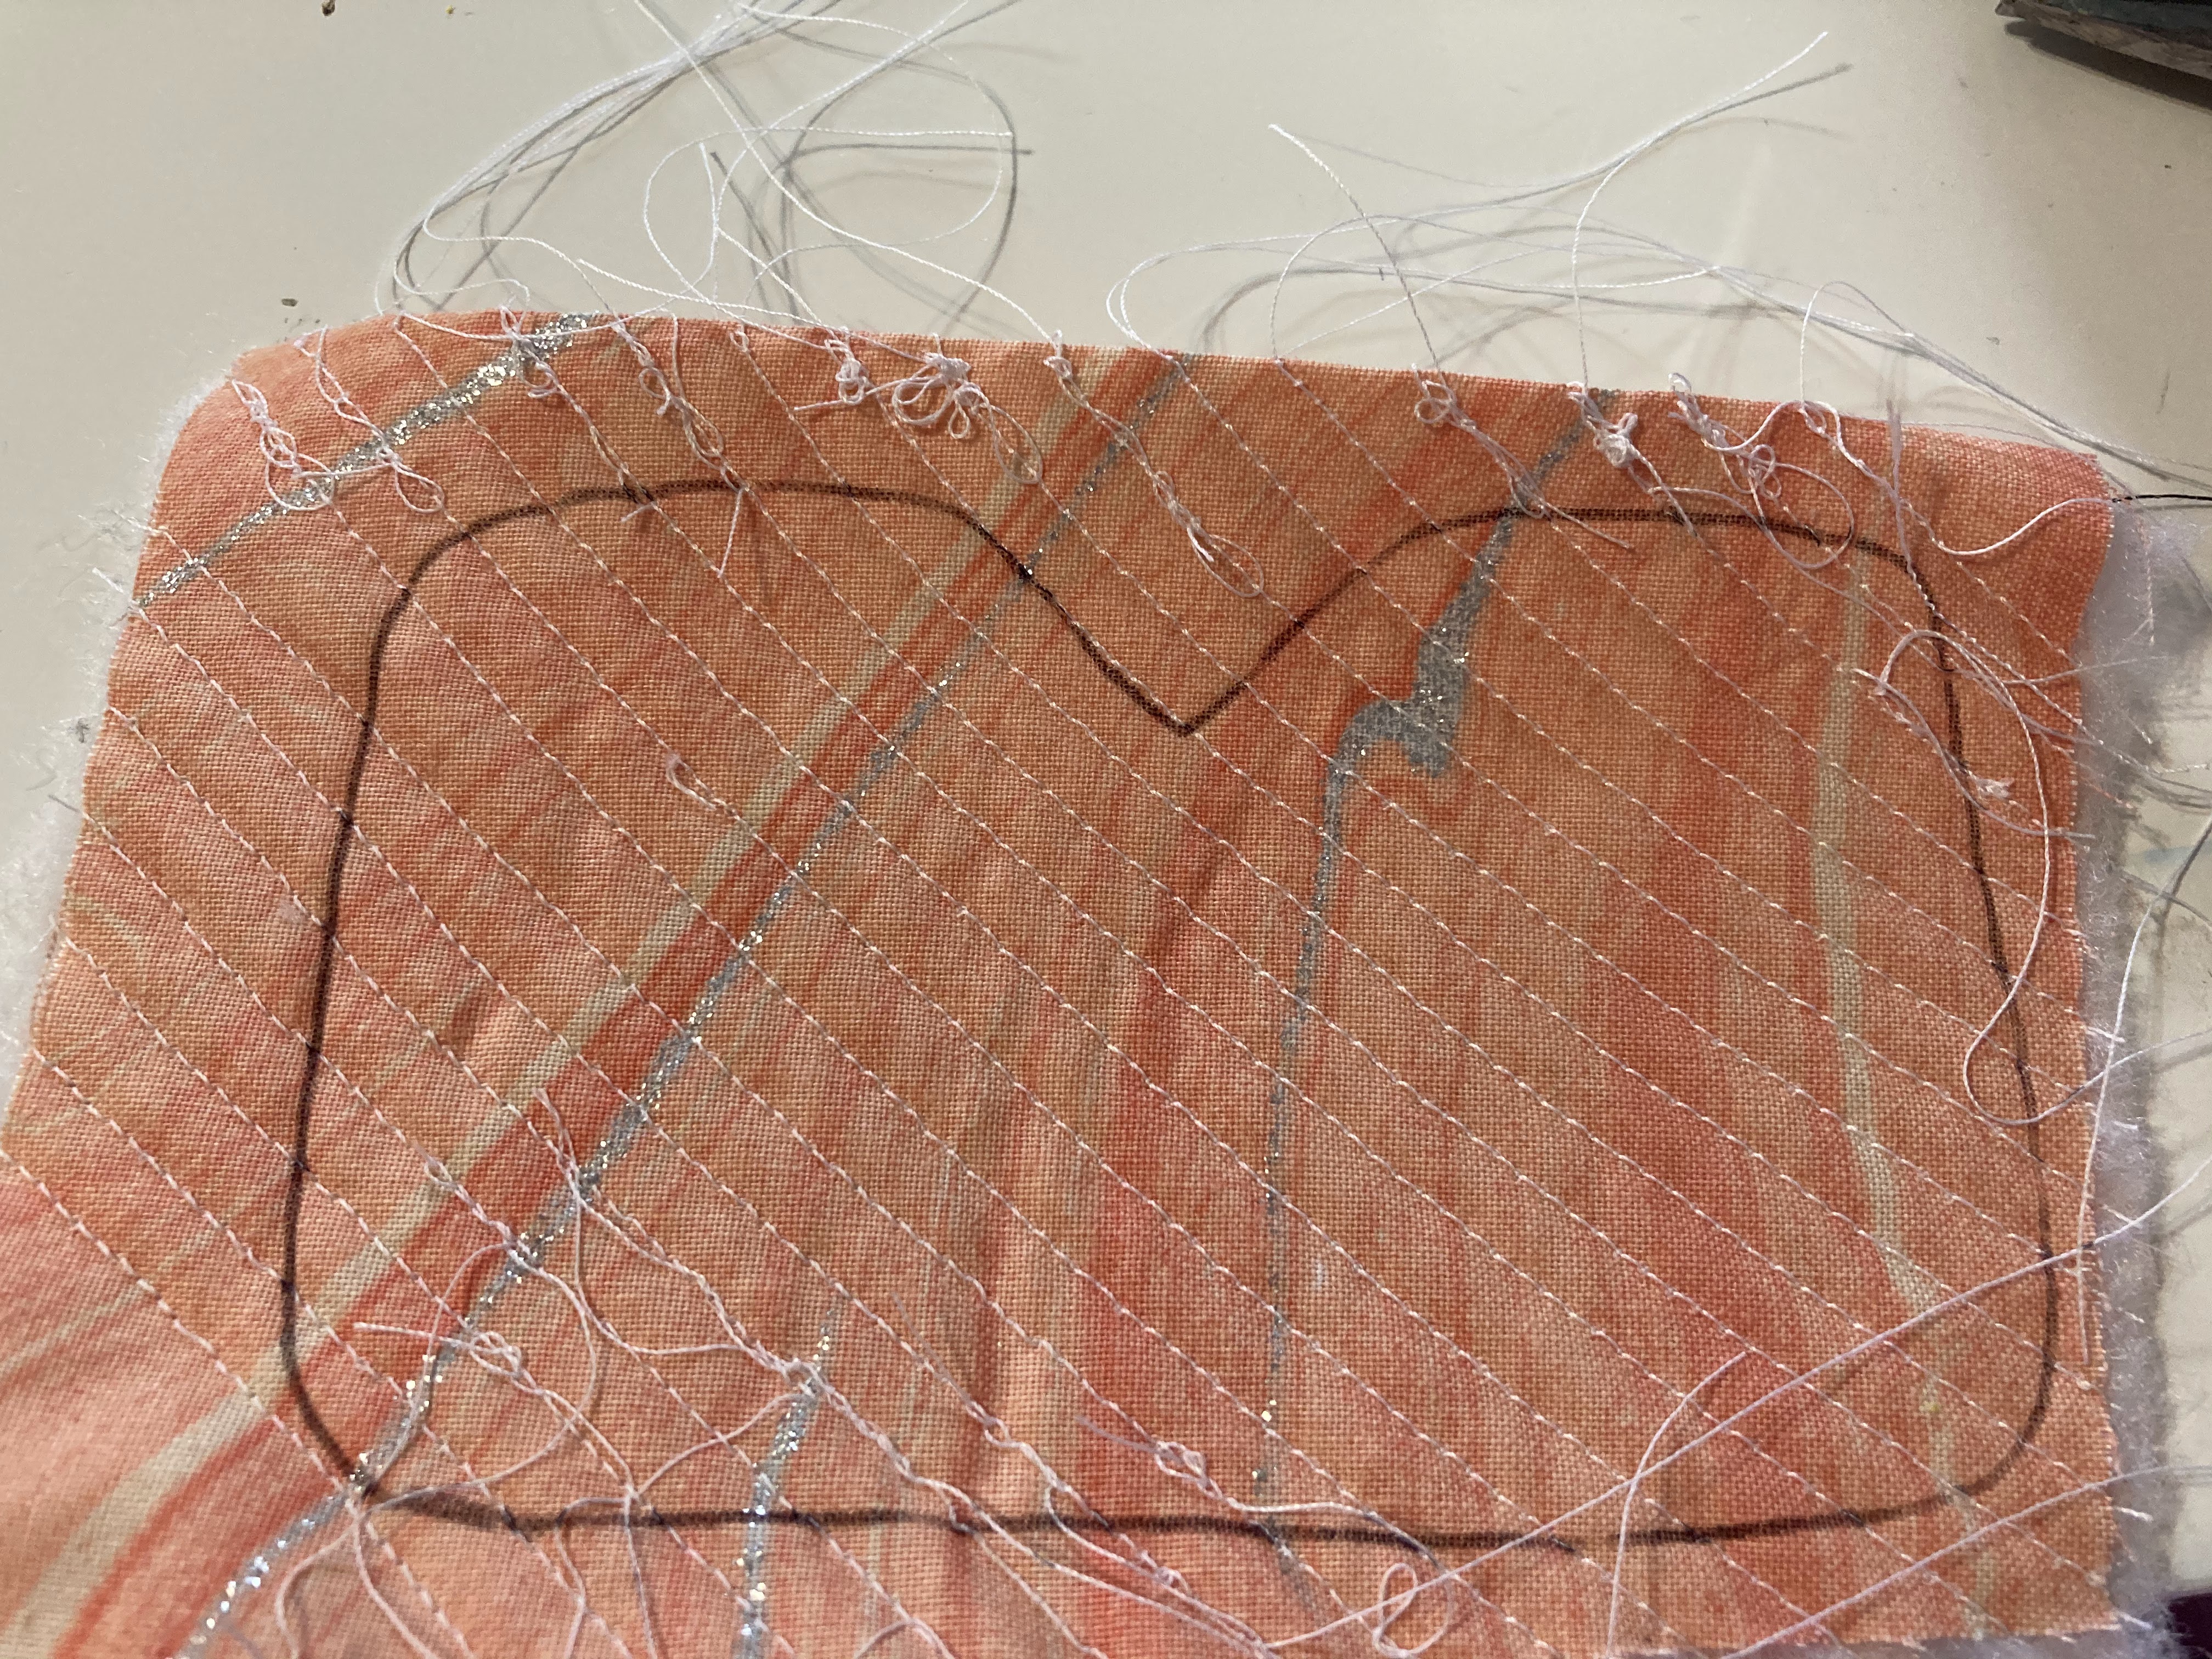
I sew the entire rectangle ...
untile I have enough room to cut out a saddle pad shape.

I flip it over and trace the pattern.

It should look like this:
After cutting it out the strings are all neat and finished.

*sigh* now you have to sew it again but in the other direction.

In order to get that lovely curve you have to fold it in half and trace it out.

It should look something like this:

Then I sew along that line making sure that I stay on it.

When I fold it over again it should have the nice curve, just like a real saddle pad!

Now for the part that gave me the most trouble. Cut out a long strip of a pice of fabric... longer is better!

And I sew the end to make a better finish.

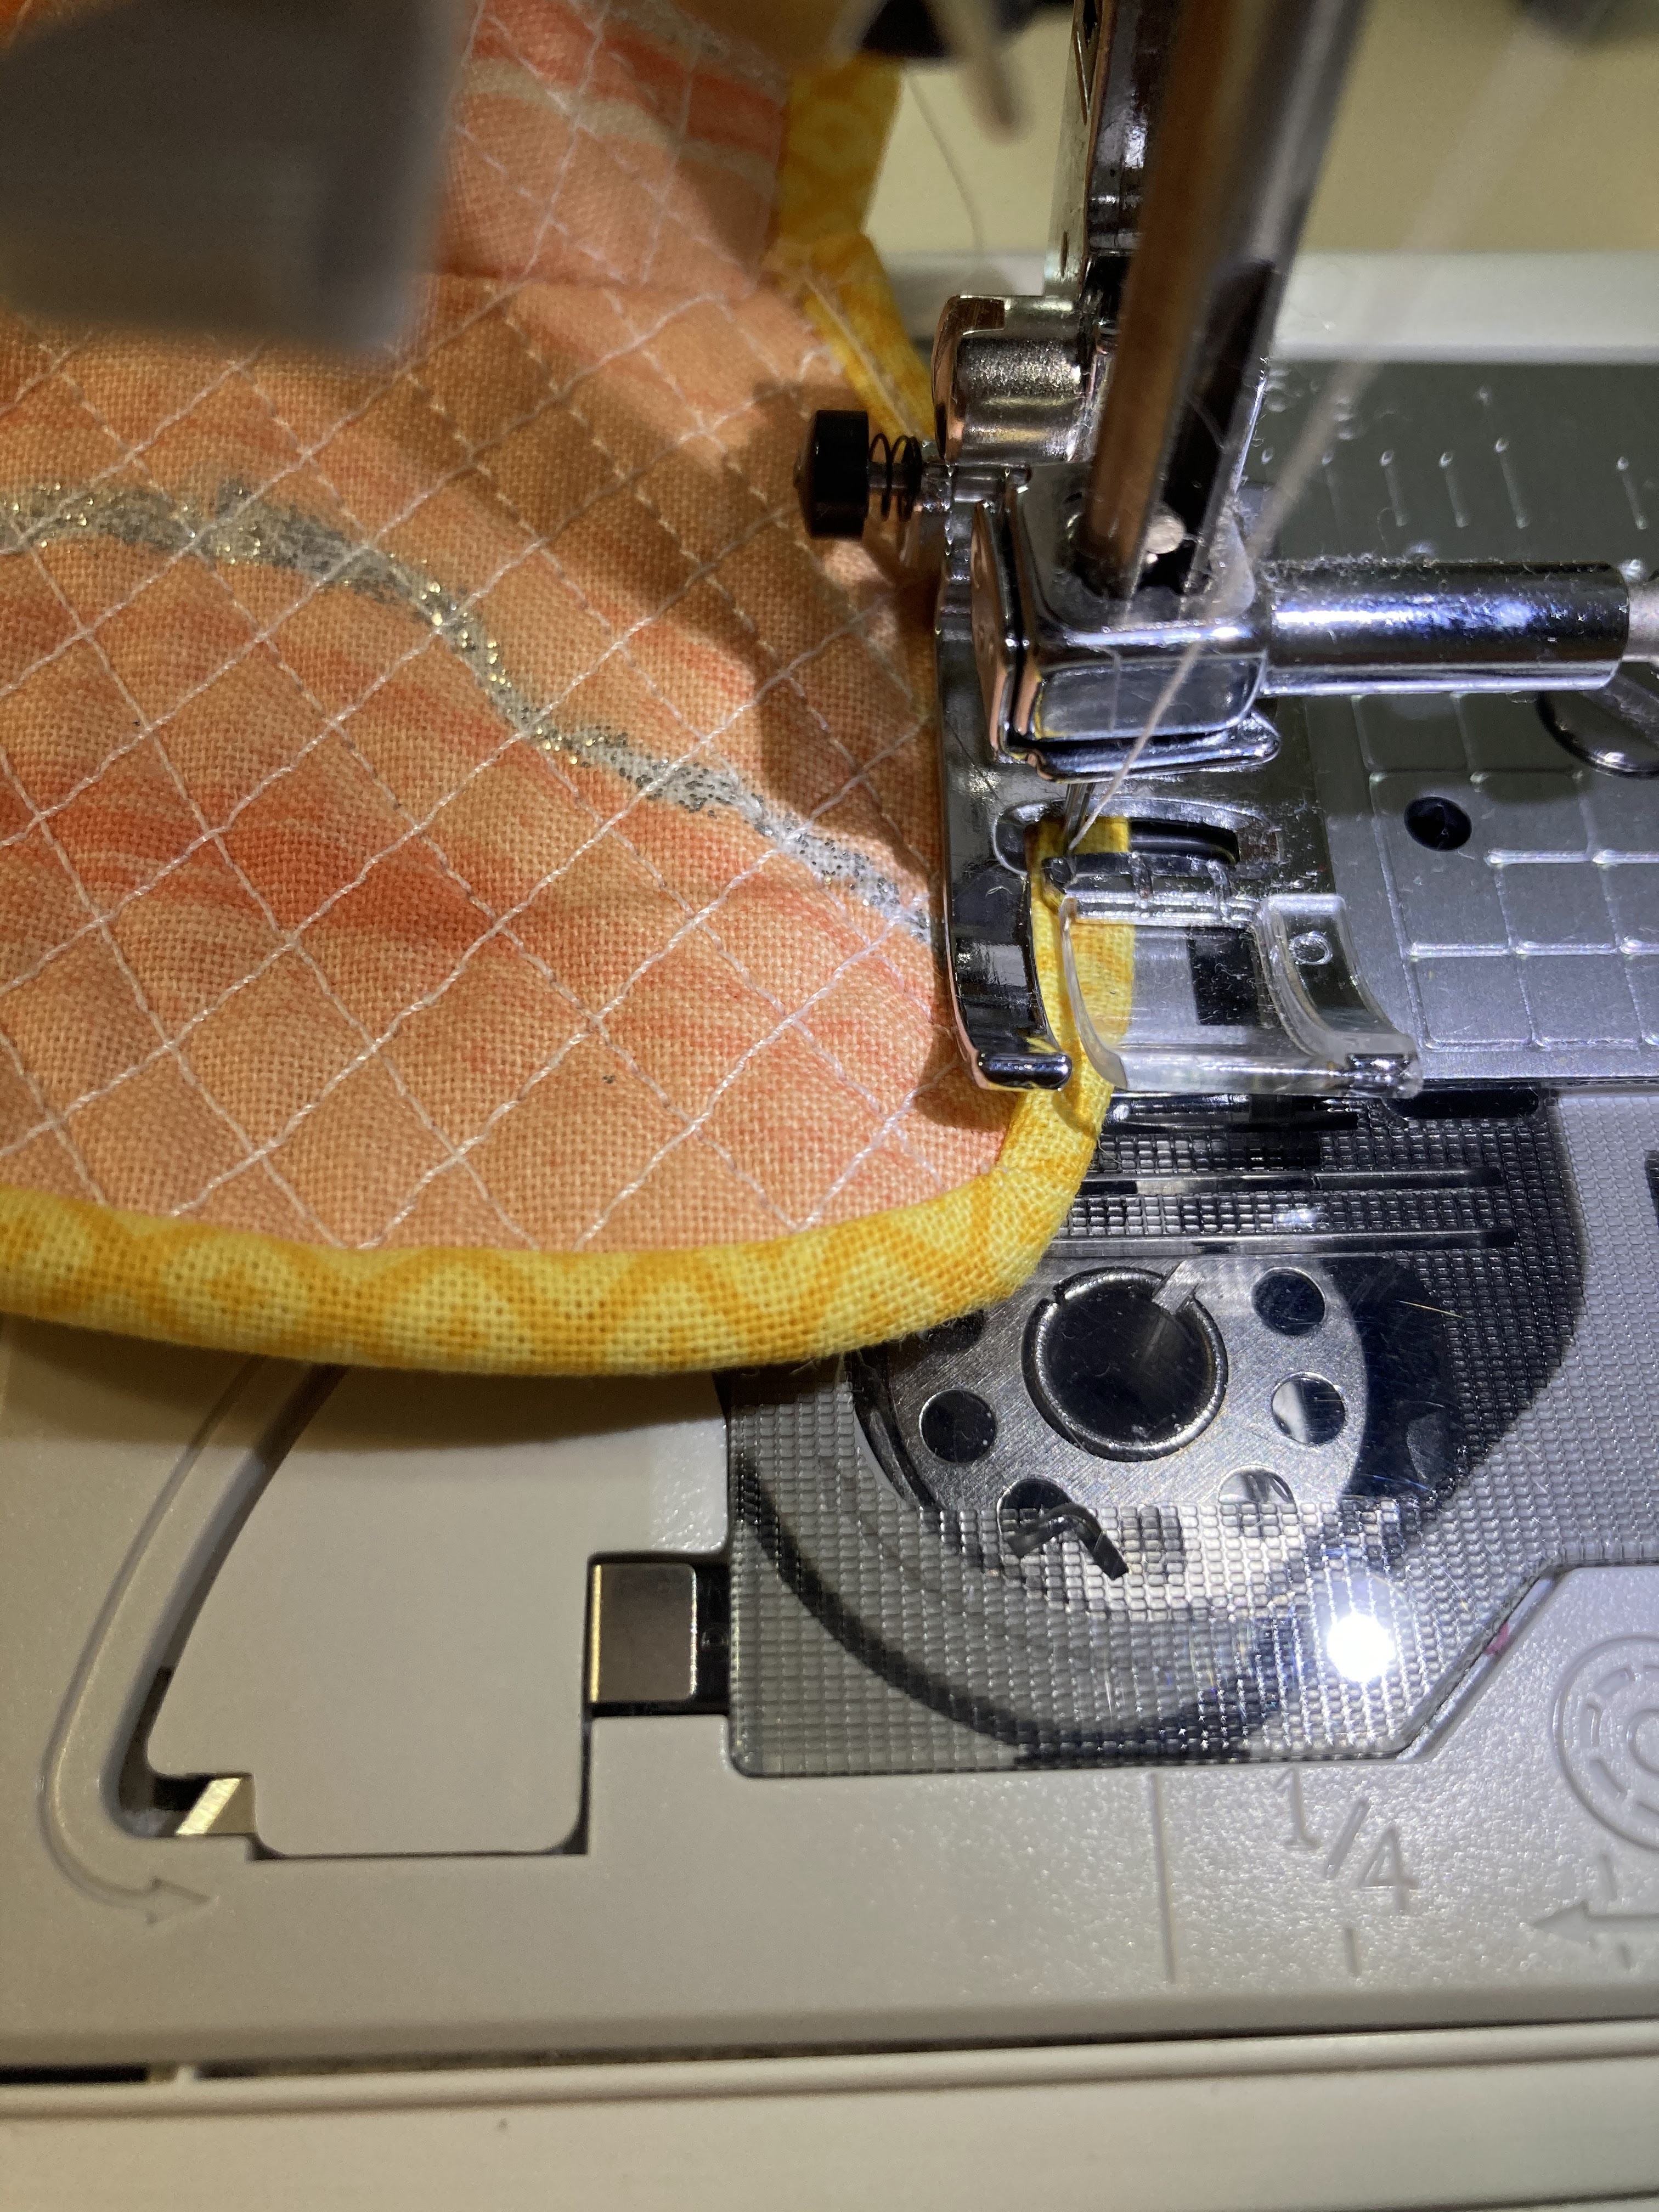
Now come the hard part. I line up the edge with the middle of the saddle pad.

I then sew along the edge making sure to bend the fabric around the edges. This is the hardest part and it took my multiple tries to get it right. I recommend practicing on a piece of scrap.

At the end it should look like a really weird duck.

I flip the fabric strip to the back side and you should start to see a border.

Last I use my sewing machine to sew around the border
And your done! Making saddle pads can be a tiring process but don't give up! The more you practice the better you get at making them.


No comments:
Post a Comment